Guide for beginners The Long Dark - tips and tricks for survival. The Long Dark Guide: tips on crafting, hunting and fishing, weather, shelter and survival How to melt snow in the long dark
Debriefing
And so, based on the game, you are a pilot. Due to incomprehensible, mysterious weather conditions, you crash land in the deep Canadian taiga.
Fortunately, you are safe, but you won’t last long in such a hole, so let’s remember Bear Grylls’ survival lessons and go look for help. However, it turns out that not everything is so simple.
Basics
Let's start with the state of your character and inventory.
By pressing TAB, a menu of options will appear and a set of indicators in the corner.

Condition
This is the state of your health, if the percentage drops to zero, you will die.
Your condition is influenced by a great many factors, and I want to talk about this in more detail. But first, I want to say that the worse your condition, the weaker you are, and wolves love the weak.
Fatigue (Fatigue)
- We are all human, we all get tired. If you run a lot and carry a lot of things, you will get tired quickly. By the way, about the advantage. If you carry more than necessary (from 30 kg), the character will not be able to move quickly, and sacrificing speed is risky.
When you get tired, the acceptable weight you can carry will gradually drop, and when you exceed it, you will see the Encumbered inscription. From this point on, calorie consumption, movement speed, and fatigue indicator will begin to deteriorate rapidly. When the indicator is full, Tired will appear first, and after a couple of minutes Exhausted will appear. Your step will noticeably slow down, you can no longer run, and the acceptable weight of your load will drop to 15 kg.
If you are outdoors at this moment, find the nearest shelter and rest. otherwise, your condition will begin to worsen.
The next no less important indicator
Cold
- You should closely monitor your body temperature.
It all depends on your gear and weather.
Without good clothes, you will freeze very quickly, no matter what. Also, it is worth monitoring the condition of your clothes, since the worse it is, the worse it will warm your big and fat “butt” from hypothermia.
As for the weather - if it's a clear day, you're lucky. But don't expect this to always be the case.
Let's divide the weather in order:
A blizzard - no matter what, you'll freeze something, but you can go.
Snowfall - you will freeze very quickly.
The fog is simply terrible. It’s very difficult to find your way around because visibility drops dramatically.
So, all these conditions can happen at one moment. At this moment, I strongly advise against staying outside.
When you start to freeze, the message Cold will appear, after a couple of minutes the message Freezing will appear - your health will begin to fall.
Hunger - Everything should be clear here. The maximum number of calories in the body is 2500. Each factor increases calorie consumption (activity, cold, burden, etc.). If you sleep, calorie consumption per hour: 85.
When calories become low, you will see the inscription Hungry.
When the calories drop to zero, you will already have the inscription starvation (fasting). Your condition will begin to deteriorate.
Thirst (thirst)
- You can replenish liquid in two ways:
The first way is the sodas and juices that you find. They are sweet, so they will not quench much thirst; however, they will replenish the number of calories. Sooner or later you will run out of this type of supply and will have to melt the snow in the stove.
If the thirst indicator is filled to the full, the message dehydrated will appear, and your character’s condition will begin to deteriorate again.
Predators, diseases and other dangers.
At the moment there is only one type of predator in the game - wolves.
Bears may be added in the future.
So, wolves are actually quite weak and slow (at least in this game).
You can kill them with a rifle, scare them away by throwing a signal torch, light a fire... or just....BEAT TO DEATH!!! muhahahahah (villainous laughter).... But it’s not so simple, they know how to piss in tea. And they will piss on you, believe me.
Fight
If the wolf does attack you, then you fall to the ground and you have very little time to “whip him in the cabbage soup”, you will have an indicator on which you must quickly click with the left mouse button and hit with the right mouse button. Do not fill the indicator completely. Pick up a little less than half and hit to throw off the wolf, and so on several times until you fight back. Thus, the wolf will get hit in the face and run away. I DO NOT recommend filling the indicator completely, only if you want to kill him (and EAT him), but this is very dangerous. After the fight, immediately bandage and take an antiseptic.
A couple more things you should know.
When fighting with a wolf, the best tool with which you will beat the wolf is automatically selected in your inventory. The best one at the moment is the Hunting Knife. Then comes the axe, and then the crowbar (Prybar).
And about bandages, if suddenly there are no bandages, then in the “Harvest” section you can tear the cloth into a bandage.
Diseases and injuries

Hunting, Stove, Bonfire, and other little things worth knowing.
Let's start with the stove/fire.
Let's generally figure out why a stove/fire is needed in this game:
To keep warm
Cooking food
for melting snow and boiling water.
In principle, you don’t have to boil the water, but it will end in Dysentery. However, there is another way to neutralize water using Water purification tablets (water purification tablets).
So, to light the stove you will need Fuel, Matches or Firestriker. There is also a magnifying lens with which you can light a fire using the sun (during the daytime). Also, to start a fire you will need a Tinder plug or you can use a newspaper you found. There is one important point - if you recycle a newspaper in the Harvest section you will get 2-4 Tinder plugs.
You can use the fuel you found/mined:
Firelog - Burns for 2 hours.
Cedar firewood - Burning hour
Reclaimed wood - a piece of fence, Burns for half an hour.
Fir firewood - burns for an hour and a half. (I advise you to save as it is necessary to repair an ax, knife, rifle, etc.)
When you run out of fuel, you will have to get it.
Go to the menu and select Forage wood to get fuel.
We choose how much wood to extract, what kind of wood, and what we will use to cut it with. This is all done automatically.
Addition: If you are in a house or other shelter during Forage wood, you will only collect Reclaimed wood, and in limited quantities. And if you go outside, then there you will collect other types of fuel. So, I recommend "Forege your woods" when you're outside.
Hunting
You can hunt deer, rabbits and wolves (which is strange).
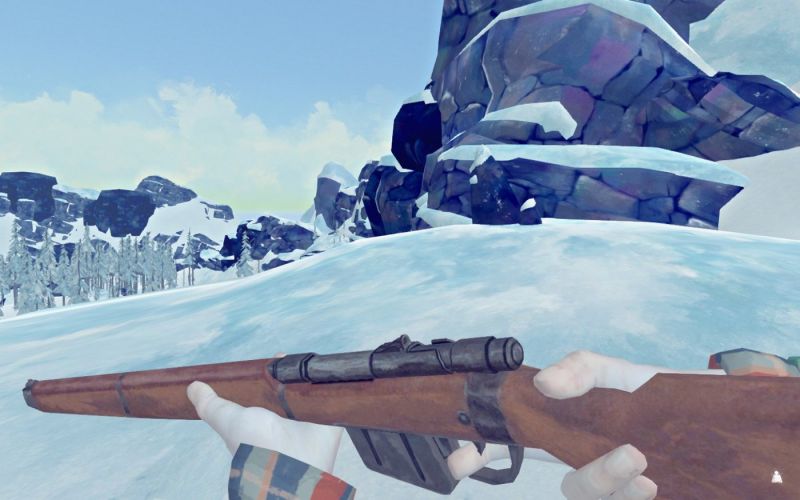
At the moment you can only hunt with a rifle. Since cartridges are worth their weight in gold here, you need to shoot rarely, which means accurately! And here you are not looking for some kind of “call of duty”, the front sight will sway quite well. You will need to aim well. And if the weather is bad, or you are tired, sick or something else, then not only will you not be able to aim properly, your bullet will spread like a shotgun.
Trap - Can be placed to trap rabbits. Every 12 hours there is a chance that you will have additional loot.
So. Now you've shot your prey.
Come up to her and choose how much meat to collect, skin and intestines... Yes, yes. Horror:D.
It is advisable to cut with a hunting knife and not an ax. You can sort of do it with your hands, but it takes a very long time, and you won’t be able to collect much because the carcass will quickly freeze.
So you have meat, now you need to cook it. All this is prepared in the oven, or on the fire.
One piece takes approximately 15-20 minutes (game time) to cook.
There are Venison (venison), Rabbit (rabbit) and Wolf meat (wolf meat??) 800-900 calories per 0.50 kg.
Craft
You can only craft at the Workbench, the following things: 
Push
Well, that's all I wanted to tell you. I will update the guide as the game updates.
That's all. I wish you long survival.
Before you go mining, keep in mind that you need to take as little supplies as possible. This means you should only take 1-2 canned goods, 1-2 water bottles, light clothing (which will come later in the guide) and some tools.
Always make sure to open vehicles completely, including inspecting the back seat and trunk. You can also find a lot of useful goodness in tires, such as ammunition, tools and high-quality clothing.
When looting buildings, check under the beds (which may be obvious) because there is a high chance that there will be canned goods under them.
When inspecting canned food or goods, pay attention to its quality. The quality of the canned food can be seen on the right. Poor quality products won't do you much good.
This does not apply to soda. Soda will always give you the same results, regardless of quality.
When looting buildings, always tear the curtains with your hands. They will give you 1-2 fabrics which can be used for various things such as bandages and clothing repairs.
Inside buildings, note that toilets and swimming pools are excellent sources of water. Stock up on water here so you don't waste fire melting the snow and boiling it.
Always pack lanterns! They are extremely useful! Even if the quality of the flashlight is only 20%, it will be able to last about an hour of game time until it breaks.
Coffee and tea are some of your best friends. They perfectly relieve fatigue and quench thirst at the same time. If these drinks are hot, they will also increase your body temperature. The tea can be used medicinally.
Try not to get lost! If it's foggy outside, retrace your steps. If it's snowing and you're completely lost, try to pay attention to where you are and get to the nearest shelter.
Fishing

This is a great food source, but it will take time to be successful. Metal scraps can be used to make hooks, and animal guts can be turned into fishing line.
Keep in mind that homemade fishing gear is not very durable, so take plenty of it just in case, especially if you are planning a long fishing trip.
You can fish in almost all fishing huts found on the ice. Once you get inside, you'll need a tool to break the ice. Do not use a hunting knife. If possible, use a crowbar.
Keep in mind that sometimes fishermen's huts will have fishing supplies, so you don't need to waste your resources too much.
Weather

Weather forecasting plays a big role and can be a matter of life or death depending on your difficulty level.
If there are clear skies with no wind, it should be an easy day for exploring or daily activities.
If it's windy, be careful as you may experience light snowfalls or real snowstorms.
If it's snowing lightly/heavily, just be careful with the wind. If the wind gradually rises, a snowstorm is approaching.
Blizzards

If you find yourself far from shelter during a blizzard, first calm down, take out your storm lantern for extra light and warmth, pay attention to your location, and make your way to the nearest shelter.
If you find yourself in the middle of a snowstorm at night, do everything the same, except your vision will be even more limited.
Cards

The latest update gives your character the ability to create your own maps.
To create a map, stand in an open area, open the quick menu and explore the area using charcoal. Charcoal is most often found on the ground or in barrels.
However, if this process is too long for you, there are free online maps of the entire world and each region.
Craft

Crafting can give you a lot of useful materials. For example, the fishing gear mentioned above, safer clothing, first aid kits, tools and much more.
Keep in mind that when the crafting menu says "cure", this means that the item must be kept inside the shelter until the gauge reaches 100%. This is used for branches, skins and guts.
Setting up a shelter

To start, you need a lot of water. So start by getting/making 80+ water bottles and storing them in your base. It will last for 50-80 days depending on your diet.
After that, classify your items on different shelves according to the same principle as inventory classifies them. For example, fire supplies, food, water, miscellaneous, clothing, etc.
Cloth

When choosing clothing, you should balance your running/walking speed with the level of warmth it will give you. It is worth adding here that you do not need to wear heavy clothes during all your travels. Instead, wear something lighter, as this will give you more mobility.
Keep in mind that wearing the right clothes is also related to weight management, which will be discussed below.
Starting a fire

Fire can be obtained using fireplaces, barrels and bonfires. Please note that large branches must first be cut into smaller firewood.
There are a lot of different sticks on the street, and you should collect as many of them as possible, because although they burn quickly, if you throw 20 sticks into the fire at once, it will not go out soon.
You should start a fire if there is a risk of hypothermia or if your character could freeze to death. You will also need fire for cooking, or to melt snow and get water.
Remember that a fire cannot be started in strong winds, so be sure to take into account the weather mentioned above.
Weight management

When collecting resources, it is very important to control your weight. When you leave your base, always make sure you have enough space left in your inventory if you find a lot of loot or meat. Otherwise, you will not be able to carry it away or move at all.
Hibernation

Hibernation is used to fast forward days when you have a large amount of resources or simply to fast forward a day or night.
Hibernation with canned food
Make sure you have everything you need in your inventory, including water, and get to the bed. Be sure to monitor your hunger and thirst while you sleep.
Also keep an eye on your health to your left. Once it drops to about halfway, eat something first and then drink.
Hibernation with meat
Before hibernating, leave all your meat outside because it will spoil much slower this way than in your inventory. Otherwise, the process is the same.
We've already talked about how to keep warm and we can buy ourselves time before we die of thirst (don't be surprised, haven't you tried being an uninvited guest yet?). It's time to talk about what takes up our secondary needs, in The Long Dark it is water. As you know, a person can survive for several days without water... in warmth and comfort. In the cold... let's try not to test it in practice. It’s better to think about how we can sidestep this problem.
The main mechanic of thirst is that you will start taking damage and quite a lot of it. You can endure them for a while, but if the damage starts to stack with frostbite, you risk being left without health too quickly. There were cases when a couple of hours in the cold was enough to plunge into darkness “forever”... It’s good that there is snow everywhere.
Pure pollutant water can be found in some bowls (little) and barrels of toilets. In fact, this source of water is quite useful on the highest difficulties of the game due to limited resources. Simply put, it will save a lot of matches, of which we don’t already have a lot.
When dirty, water is available in campfire mode. We can melt the snow and then boil the water. Apparently, our hero carries a decent amount of containers with him, very thriftyly. You can also use special tablets for cleansing, but it is difficult to say how these methods differ from each other. In the absence of a difference, why pay more? In our game even 150 gr. weights can make life much easier. If I'm not mistaken, the mittens weigh about the same.
It makes sense to prepare a very large supply of water if you are going to stay in one place indefinitely. This way you will save matches, but carrying 10 liters of water with you is not the best idea.
The main purpose of water is to relieve thirst, but it can be used more effectively, which we will discuss below.
Soda is good because in addition to thirst, it also restores hunger, so their value compared to regular water is noticeably higher.
Green tea helps restore health faster when you are full, which, coupled with temporary fasting, is a very effective way to save food. You just fast to a certain level, say 50%, then drink tea and overeat. The effect is simply wonderful.
In addition to hunger, coffee gives you energy, which is very useful on long marches. Do you remember that if you are exhausted, you cannot run? Don’t give the wolves such joy, and it’s easier to jog through the cold.
Rose hips and mushrooms have their own medicinal effects, but also slightly increase satiety.
Any tea will be convenient if you leave the shelter and you still have a light in the stove. Just make tea, even without the medicinal effect, you will still get a heat bonus.
All the drinks listed above have some calorie content and the same weight. Carrying a liter of coffee with you is much healthier than carrying a liter of water.
Many people believe that this game is just another “sandbox” with survival elements, but this is not entirely true, because it has its own storyline with an interesting story and a lot of different tasks. However, some tasks may seem difficult for players to complete, so we decided to write a detailed walkthrough of The Long Dark.
Episode 1 – Don't Go Quietly
First chapter
On the first day we will appear near cracked trees and a crashed aircraft flying across Canada. First of all, we will need to tear out the metal fragment from our hand. We go up to the cave, not forgetting to take sticks and pieces of fabric with us. Along the way we will also come across a first aid kit. Next, light a fire by opening the quick action menu. Then we put a bandage on the wound to stop the bleeding. Then we go to bed.
On the second day, we notice that the main character will not last long without water, so we get out of the cave, find fuel to make a fire and examine the boxes lying next to the wreckage of the plane. Under some boxes you can find a bonus. After lighting the fire, we begin to melt the snow to obtain water. You shouldn’t drink it right away—boil the liquid first. Afterwards we find an antiseptic and use it on the wound. At the end we go back to bed.
The next day, you need to collect a large number of branches so that the fire can burn throughout the night. We get out of the cave and begin to look for wood. We destroy wooden boxes and make a fire. In the second box, located on the left side of the cave, we find 4 books. Next, we approach the fire to warm up a little. Melt and boil water, making supplies in advance. However, in the game we will not always be able to light a fire.
With the onset of a new day, we get out of the cave and move up the fallen tree. We take our time - we find Astrid’s suitcase and watch the video in which we find out why exactly Mackenzie ended up in such a situation. On the right side we find a deer carcass. After skinning it, we try to climb onto the ledge, but the main character will not be able to do this and will sprain his ankle when falling. We collect rose hips to brew a light pain reliever. In the “Crafting” section you need to prepare rose hips for brewing tea from it. You should also start cooking meat. Until the character satisfies his hunger, he will not go to bed.

On the fifth day we again climb the tree and climb onto the ledge from which we fell earlier. Then we see a fallen plane below.
Chapter two
Having reached the plane, we watch a short video. We are following in Astrid’s footsteps, but first we take a good look at the surroundings and pick up everything that may be useful to us in the future. Then we follow the “breadcrumbs” left by the girl. We come across a piece of Astrid's clothing and continue to move forward until we find the second piece of fabric.

We pass through the rabbit clearing and go up. Near the corpse of a deer, we turn to the right and reach the cave. Although it will be a little dark in it, we will still be able to distinguish objects. We examine the corpse on the ground and move on. We study all the adits and select everything that is not screwed to the floor. Then we head to the exit from the dungeon.
Ahead we will see a wolf dealing with the carcass of a dead deer. We go around it on the other side, without attracting attention. To do this, we squat down and walk along the right edge of the beast.

We go out onto the road and find a dead end on the right side, so we go left to the bridge. However, there is a wolf near him. If the beast sees us, then we can climb into the nearest transport and sleep there for an hour. We don’t climb the bridge itself, but go around it along the right path. Then we turn right again and move forward along the path. After some time, we watch how the wolf deals with the rabbit. We crouch and go around the predator on the left side of the lake. We find ourselves on the road again and head straight. Ahead we find a trailer where a lot of useful things are hidden. We rest in it, and then turn left.
We continue to move straight and see a dilapidated church, next to which there are also wolves running. Before entering the structure, we create a torch to scare away predators. In the church we select the necessary things, and then we leave it and go towards the bridge. We move from one car to another, simultaneously fighting off wolves with the help of a torch.

Having crossed the bridge, we find ourselves in an abandoned town called Milton. We see smoke coming from the chimney of one of the buildings and decide to check it. However, first we search the cars nearby and go to the bank located opposite the above-mentioned building. In the bank you can find the key that unlocks the banker's house. Then we go to the building from which the smoke was coming. We watch the cutscene and talk to the blind lady. She'll tell us everything she knows after we chop her wood. We go to the barn and take an ax.
Chapter Three
Now if we pick up objects that are highlighted in red, we will automatically become a thief. Thus, the character who owns the item we stole will begin to trust us less. To find firewood, it is not at all necessary to go into the forest and chop down trees, but we will still need an ax in the future. Next, we visit nearby houses and find wooden furniture in them. We break it down and take the boards to the woodpile located in front of the Gray Mother's hut. Having filled it 100 percent, we go into the house again and watch the video.
Then you should start looking for food, the total calorie content of which should be about 10 thousand units, and place it in the refrigerator. However, at this point in time we should already have accumulated the required amount. If not, then we can go to the local gas station or deal with a couple of wolves walking around the city. Having completed the mission, we talk to Mother and watch another cutscene. She will give a few facts, and then we will say that she is tired and will stop talking to us. We kick back for a couple of hours, and then we return to the lady and talk with her again.
Gray Mother will ask us to go to the tunnel leading out of the town and tell her what happened there. We take some food, repair our equipment and hit the road. Having got out of the house, we turn to the left and move forward, passing by the gas station. Near the prison transport we examine the case and see a cut-scene. We return to the old lady, but now we will meet several wolves at the gas station and in the city. We can kill them or simply avoid them. The main thing is not to forget to pick up reishi mushrooms (which grow on tree stumps) and sticks along the way, as you can get trust points for them. We go into the hut and see a video. The woman will be upset that the tunnel is now blocked and will ask you to visit her later.
Going back, we look at the dialogue between the characters. We should already have the code for the bank vault in our inventory. It is located in a house that can be entered using a key that we previously found in a bank. Next we head to the farm: we leave the Gray Mother’s house, turn left, reach an intersection, then turn right and at the end of the road we find the desired object.
We move around the city with caution, as the number of wolves in it will constantly increase. We walk from house to car or from building to building to avoid predators. If something happens, you can rest in the shelter for 1 hour. Having reached the farm, we come across a wolf in the hangar. We deal with him and examine the corpse on the floor. We find the key to the safe from him. The key to the farm lies in the blue pickup truck on the dashboard.
We climb into the farmhouse and turn into the right room. We see an urn hanging above the fireplace and find the key to the cell in it. Then we return to the city and go to the bank. In it we open the desired cell and look for things that were stolen from the Gray Mother. We go to the woman and watch another video.
We take on a new task from a cunning pensioner. She will ask us to go to the church and give the decoration to a certain Lily at the cemetery. We go to the destination and watch a cutscene in which the main character places a jewel on the girl’s grave. We return to the elderly lady and learn the story about her daughter (Lily), who fell from a cliff and was killed. She will allow us to take her equipment and advise us to go to the Persistent Mills.
Chapter Four
We wait for clear skies before we begin our dangerous journey. In the meantime, we stock up on provisions and repair our equipment. Having prepared, we leave the house and head to the gas station. However, right before the gas station we turn right and continue walking forward to the mountain park. Inside it we go to the right and get to the picnic area. This is where we need to use a climbing rope to reach the ledge.

Almost at the end of the descent, the main character will slip and fall down, escaping with a couple of bruises. We go near the mountain on the left side and reach the second cable, which hangs from the cliff. We empty our bag of unnecessary things, and then get enough sleep. Next, we go up and turn left, heading towards the cracked tree. Using it, we move to the opposite side and find the waterfall.

We head to the waterfall and find a cave not far from it. We go inside and rest in it to prepare for a new trip. We get out of the cave and watch how the bear kills the hunter. This ends the first episode.
Episode 2 – Light Fugue
First chapter
We find ourselves at the Mysterious Lake location right in the Trapper’s house. We watch a short video, and then begin to look for provisions and equipment for the trip to the Carter hydroelectric station. It is best to go to the Administration of the tourist base. We get out into the street and go down the hill on which the building stands. We pass next to the barn (on the left) and get to the railway. In order not to lose the right path, remember that the dead body and the tree must remain on the right. We climb the hill and go forward straight to the railway road (the route is shown on the map below).

Having reached the road, we turn left. After a couple of tens of meters we find the desired structure on the right. We go into it and find in the document cabinet (located on the 1st floor) a key that opens house number 3, located next to the lake. We carefully search the premises in the building and take away all useful things. We leave the Administration and decide which way to get to the hydroelectric station. The first route involves traveling across the lake. As a rule, many wolves live in a reservoir. The second path is connected to the railway, and the third is connected to the hills. We choose any of them and head towards our goal. We get to the bridge near the hydroelectric power station and search the trailers. In them we find a key that opens the gate leading to the place where the equipment is temporarily located.
We open the gate that leads to the dam and go into the building. We examine the reception area and wait until the next video passes. On the right side of the reception area, right on the shelf, we find a case containing a signal pistol (you can use it to scare away predators). On the other side of the case we find a ladder. We go to the toilet and search the dead body, finding a key that opens the door to the administrator's office.
We go up to the 2nd floor and look for the first aid cabinet. Unfortunately, you won't be able to unlock it with a nail puller. We continue to move forward and open the administrator's office. Let's explore the room. In the safe we find a syringe, and in one of the desk drawers there is a key to the locker we encountered earlier. Opens the closet and takes the first aid kit. Then we go to the Trapper. We can choose any return route, but the route along the railway is the most dangerous.
Mysterious lake
Don't forget to complete the side mission - get out of the hydroelectric power station and go northwest from the bridge. We keep to the left and get to Alan's cave.

We examine the cache, and then get out of the cave. We discover a hunter's tower, not far from which a dead body is lying. We search it and find the key to house number 2 (located near the lake). We return to the entrance to the dungeon. We go to the left and reach the southern bank of the river. We explore the houses that stand next to the pond. In them we look for supplies and good things that will help us in the future.
We head to the administration of the tourist base, walking along the western side of the lake. We pass through the “Lake Path” straight to the administration. Then we go out to the railway and turn left. We go a little forward, and then turn right and head towards the destroyed building.

There will be many traps in this area. We go straight from the house - there will be a large boulder on the right. We go around the cobblestones, and then turn to the right and climb the hill. We go further and find ourselves at Max's last parking lot. We go into the trapper's house. We watch the video and talk with the Trapper. He will give us a broken gun, which should be repaired at the marshalling yard. We leave the building and head along the railway road to the Lonely Swamp location.
Chapter two
Once in the Lonely Swamp, we go forward, without leaving the railway. Having reached the end of the railway tracks, we go to the Mysterious Lake Railway location. We continue walking along the tracks and reach a repair station. Having stumbled upon a landslide, we do not go down to the stream, but climb the hill on the right side, and then go forward. We reach the front of the train and turn right. We walk about a hundred meters, keeping to the right, and find a workshop ahead.
The front door will be closed, so we enter the building through the right passage. In the room we find a door leading to the workshops. Once inside, we watch the task update. Now it’s worth repairing the weapon using a milling cutter. We go to the opposite side of the hangar. We come across a dead body and watch another video. There is a manual milling cutter on the table not far from the corpse.

We turn it on and don’t forget to grab the bolt cutter that lies near the router, since it is this that will help us get to the hunter’s house. We leave the workshop and watch as the main character falls unconscious. When he comes to his senses, we see that everything around has changed - the wolves began to glow green, and the instruments around him began to blink chaotically. We are heading to the hunting lodge. We go around the hangar and move straight to the lake. We find a building on the hill.
Near the reservoir we turn right and reach the bridge. Using a bolt cutter, we open the lock and go up the path. We continue to walk forward to the house. We are in no hurry, as there are wolves roaming near the building. We go around them to the left.
Once in the house, we look for a gun that hangs on the wall. In the basement we find a lantern without energy and a climbing rope, thanks to which you can quickly go down the hill. We go to the 2nd floor and find valuable things in it, including ammunition for weapons. Then we return to the Trapper's house.
Along the way we encounter the bear that Jeremy told us about. We don’t attack him, since this will only lead to the death of the character, so we try to get around him without catching his eye. It will take a lot of time, but we will eventually be able to get to the Trapper safe and sound. We watch the new video and select the “Hunt” mission.
Chapter Three
In the “Hunting” task we have to find and kill deer, obtaining about 10 kilograms of meat. Several animals can be found near the Nameless Pond (indicated on the map). Kill them and collect the meat.
Note: you should not kill a deer from afar - it is better to crawl as close to it as possible and only then take a shot. In this case, you will most likely be able to finish off the beast with one shot and you will not need to look for it in traces of blood in the snow.
Having collected a sufficient amount of meat, we put it in a container located near the house. Having completed the task, we return to Jeremy and select the quest “Clothes”. The trapper will give us a fur coat made from bear skin for repair. Now we need to get to the observation post, and to do this we will first have to get to the Trap Zone. Once in the desired location, we turn to the left next to the destroyed house. Then we walk along the path until we reach a fork. The right road leads to the railway and the administration of the tourist base, and the left one leads to the observation post. We choose the desired path and go up.

We go into the forester's house and find a bear skin on the floor. We repair the Trapper's fur coat and go back. We talk to Jeremy and take on a new mission called “Fishing”. You will need to go to the administration to find gear. We go there, find the required item, and then move to the pond to the fishing house. We stock up on wood in advance to make a fire, which will burn throughout our fishing. We catch a fish and give Jeremy 5 kilograms.
Note: Even if you have caught a sufficient amount of fish in advance and have already put it in a container, you will still have to pick up the gear from the administration building. But as soon as you take them, the next point of the task will also be automatically counted.
- Reishi mushroom - you should look for it only on tree stumps. We recommend visiting the Trap Zone and Nameless Pond locations.
- Rosehip - while in the Nameless Pond, we go up to the Frozen Stream. On the right side we find a rosehip.
- Old hanging moss grows almost everywhere, including the Trapper’s house, so we had no problems finding it.
- Timothy stems (reeds) – we find it near bodies of water, that is, we visit the Mysterious Lake or Nameless Pond. You can reduce the graphics settings to a minimum so that the grass disappears and only the reed stalks remain visible.
Chapter Four
Having completed all the tasks, we receive a Hunting Knife from the Trapper. Next, he will invite us to fight the terrible Bear and kill him to obtain the necessary information. There will be no need to look for Clubfoot, because when we leave the house he will immediately appear in front of us. We shoot at him and try not to fall under his blows. You will have to fight the bear 6 times. Having dealt with the predator, we cut off its ear (a bug may occur in which it is not possible to get the ear - in this case, restarting the game may help). Then we go back to Jeremy.

Chapter Five
We watch the cutscene and learn about the dam and the mysterious message. You need to go to the Carter hydroelectric station and be there at night during the northern lights. Be sure to take a nail puller with you. Having fulfilled all the conditions, open the door with the button panel.
We find the switch to activate the elevator. We leave the room and turn left to the elevator. We go down to the first floor. We try not to step on live wires, as they can cause burns. We go to the left side of the room, go up the stairs and cross the bridge. There we find a climbing rope. If our backpack is full, we will not be able to use the rope. In this case, you can either remove the cable and jump down (you will get hurt), or throw unnecessary things out of your bag.
We find ourselves on the lower dam. We search the first two rooms, go to the generator room, go through the 1st column and turn to the left. We go along the wall to the switch.

We turn off the electricity supply and boldly walk ahead, since the wires now pose no danger to us. Having mastered the long corridor, we find several sparkling wires ahead, right in front of the ladder. We run across them and rise to the 2nd level. We examine the first room, and then head to the next. After the main character, someone will hit him on the head and he will lose consciousness. We watch the video and move on to the passage of the new episode.


