How to make a ring from a coin. DIY coin ring. How to make a ring from a coin How to make a ring from a coin
Hello people with hands from the right places and simply sympathizers.
I'd like to tell you how I learned to make super cool coin rings. But no. Super-cool didn’t learn.
In any case, I haven’t yet reached the level of “that’s it, now I can retire,” so let’s just call them ordinary coin rings.
Below the cut is a path through thorns, garage workshops and the suffering of numismatists.
It all started four years ago, when a post “how to do it easily and simply” began to actively circulate on VKontakte. There were 9 photographs, in two of which they hit a coin with an iron hammer, and then it was all so beautiful and unharmed. They used US quarters (25 cents) and I had a bunch of quarters on my desk from a recent trip. This is a sign, I thought, and forgot about this post for two months, leaving the quarters to gather dust.

According to the laws of the genre, this post came across my eyes quite regularly, so that at one moment I realized that I had not had any new hobby for a long time and wondered how it was actually done. I took a few five-ruble coins, a couple of cans of beer and went to the garage to experiment. Now I understand the importance of the accident that I came across coins before 2009, copper-nickel, and not modern steel.

A couple of hours of experiments showed that a garage of the “don’t throw anything away” type is good, but even this is not enough for comfortable work with unfamiliar material and requires a few specific tools. For example, cutting out disks, because when drilling with a drill, terrible sagging remained and the coin bent from heat and pressure. Or a jewelry bolt, which at first I tried to replace with some random, rusty, barely conical piece of iron. About six months remained before the video of lawyer Egorov appeared, where he turned a crossbar using a grinder from rebar in a lathe.

I googled YouTube, first ours, then a foreign one. I found out that a) no one does this in Russia, b) in the states it’s already commonplace and is in demand, c) almost no initial investment is required and everything is done quite simply (three times ha-ha). The only conclusion was made - we had to jump. I gutted my stash, went to Jewelry Tools, and left the stash. In fact, it only took about 5 thousand rubles for basic jewelry equipment (cutting tool, crossbar, plastic hammer). If I had ordered all this on Ali, it would have been much cheaper, but I needed it here and now. You know how it happens.


In fact, the manufacturing process itself is quite simple, although somewhat specific in terms of the tool used and more like instructions for a lathe. Everything seems clear, but it’s not clear.
Tools you will need:
Jewelry tool:
- Cutting out disks, like this. You can use a drill, but it’s time-consuming and inconvenient. On Ali, of course, there is also cutting:
A crossbar, this is a kind of metal cone, you can’t do without it, you can machine it from reinforcement like Advocate Egorov or again on Ali, you just need to make sure that it is steel (and not plastic) and smooth, without steps:
Common tools: calipers, a vice (you can do without them, but it’s more convenient with them), a regular hammer, a plastic hammer (or textolite) for saving the design on a coin, a 20 cm piece of PVC pipe (preferably of different internal diameters ± according to the size of the desired rings), file, fine-grained sandpaper, polishing (goi paste, for example).
The algorithm is as follows:
Find the center of the coin and cut a hole approximately 10 mm in diameter. Punching or drill

We put the resulting washer on the crossbar and tap it with a plastic hammer so that the edges of the coin begin to bend down.

Having bent the washer at least 45 degrees, we turn the bolt horizontally, resting the coin on some board. We continue to knock on the coin so that it continues to press against the bolt.

Turn the coin over on the crossbar with the wide part facing up. We put a piece of plastic pipe on the crossbar, resting the end against the coin and knock with an ordinary hammer on the pipe from above, pushing the coin lower. The point is to remove the taper of the ring, making its walls parallel. We try not to overdo it with stretching, because... Without a jewelry anchor and a vice, you will not be able to reduce the size of the ring.

We remove the ring, clean the edges with a file or coarse sandpaper, then fine sandpaper, then polish it.

Done, you are amazing! But I warned you that it looked like a lathe manual.
I used this algorithm to make rings for the first six months. Now the process has become much more complicated (but faster), and new tools have appeared in the equipment park, from a ring stretcher (Buratino) to special cones ordered from a turning workshop.
However, even then there was enough enthusiasm that even a friend’s broken finger did not prevent me from making it work. The plaster helped to hold the Dremel correctly.


About a year later, I finally learned how to work with silver. This was truly a great achievement, because before this, silver coins broke in about half the cases, which did not add optimism at all. It turned out that I simply annealed the silver incorrectly. That moment when a jewelry education WOULD be very useful, and Google actually came in handy. From the same series, the moment when I cooled a steel coin heated during annealing in water and could not understand why the hammer then crumbled on it. Literally, “How the steel was tempered.”


But, of course, we couldn’t do without a variety of first pancakes, and we still can’t do it to this day. The box with “Pinocchio curves” is regularly replenished, although at a slower rate than the “ready” box, which is good news.


I was working then, three years ago, with a friend in my garage. Naturally, there is a warehouse of junk there, like in any garage where the car is not parked. Well, a couple of free square meters for us. We don't need much. And one day they called and said, “We’re here from local television, we heard about you, we want to come to the workshop and film a report.” We were a little shocked, a little starstruck, and to celebrate, we said such nonsense on the entire TV that it’s still embarrassing to watch. And all this in a garage littered with rubbish.

Another time, a friend wrote to me “one day.” “I’m here,” he says, “I’m organizing a cosplay festival, let’s sell your rings there?” This is how the era of handmade markets opened for me. First locals in Yekaterinburg, then to neighboring regions. Last year I went to Moscow twice. We received you warmly, thank you.
With these markets, I had to again activate the “come up with something out of nothing” skill and create a stand. I didn’t want typical jewelry, I’m a creative person, so this miracle was born. Figure eight plexiglass, laser cutting of slots, end RGB tape and top lighting that has gone from “yes, it will do” to a 1600 lumen LED strip.


The year before last, due to circumstances, I had to leave my warm home garage and urgently find a replacement in a permanent garage. There my dream of a separate workbench came true. I extended the legs to an ordinary office table, pulled everything together with corners and firmly attached them to the floor and wall with corners and anchors. Of course, it’s not worth hitting it with a hammer, the tabletop vibrates from impacts, but the vice and pinocchio hold confidently, nothing moves anywhere and it’s generally pleasant.


Over time, I wanted more in making rings in the truest sense of the word. Large coins are always more attractive than small ones, and US craftsmen have long mastered them. Again, Google helped me find the terrible phrase swedish wrap method, which essentially means pressing the finished ring into a polished inner cone to reduce the size. Plumbing Teflon sealing tape came in very handy here to protect the design of the coin. And PVC pipes. And balls from bearings. And all sorts of other unknown crap that is beautifully laid out on the workbench in the previous photos. I'm telling you, it's a complicated method. But it turns out well.


So I got to, essentially, the icing on the cake. I went to her for a very long time - almost two years. The first idea to make a GIF of creating a ring from a Morgan dollar arose when I made the very first animation of copper pennies and immediately wanted to raise the bar. But then I still didn’t know how to work with silver. Then a second problem arose - the size of the coin. For the technologies existing at that time in my workshop, the coin was too large, 38 millimeters is no joke. But this was also decided (the largest coin I worked with was this moment- this is the British crown 1937, 38.6 mm). True, the gif was still a long way off. It is one thing to learn how to make rings from such a coin, another thing is to find the time, place and situation to film the creation process. I won’t describe typical everyday problems, everyone knows them, but they took a few more months.
But, like everything in the world, it finally happened. Three hours of production and filming, five hours of processing and creation, a total of 8 hours of work for a 15-second animation. Amazing efficiency. Tag sarcasm.
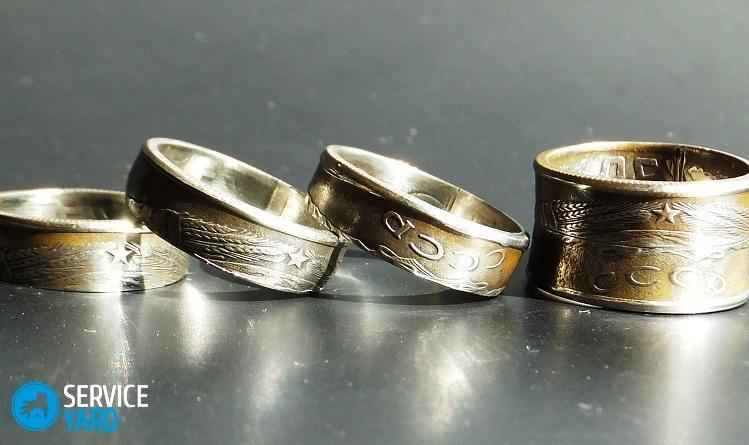
The year of manufacture is stamped on the coins. This means that you can make a ring from a coin with significant date for you or the person to whom you will give your product. This will be an original themed gift, made by yourself. The method proposed by the author of this idea is suitable for any coins.
To make a ring from a coin disk, you need to make a hole in it and then unfold the resulting blank using a Morse taper. The smaller you make the hole, the wider the ring will be. However, it will be difficult to make a wide ring, since when unfolding the coin you will have to try not to tear it or crush it.
The actual work of turning the coin inside out is carried out with a stand with a wide hole. To do this, you can use a bearing, pipe end or other device. By heating the workpiece, you can protect it from rupture. Experience has shown that paper is a good protector that can protect the inside of the ring from damage. To push the workpiece, it is advisable to use an aluminum tube, since this metal is softer and will not damage the future ring.
After creating the ring blank, all that remains is to grind the product.
The second useful video from this master on the topic of coin rings.
As additional information Another video on the same topic, but with the approach of a foreign master.
Here's another video lesson on this topic.
Unique jewelry has always attracted attention; just remember the battles that took place in The Lord of the Rings. In this video you will learn how to make a unique ring with your own hands from regular coin. In our case it will be rubles.
Mark the center of the coin and make a hole in it. We cut off the resulting burrs with a file. Then we need to put this blank on a metal rod. In the case shown, this will be the core. Having placed the emphasis on the board, we begin to carefully tap it and this must be done at an angle to the workpiece, so that the side of the coin with the pattern begins to turn outward.
Our workpiece has outgrown the core and now, to further bend the sides of the money and enlarge the hole, we will use a turned sleeve from the key and then a processed plumb line - ideally, it is better to have one rod with an increase in diameter from small to large. If you have a vice, they will greatly simplify the task. But be careful, the vice can ruin the drawing.
Let's warm it up thoroughly and start forging ours. This process is very labor-intensive and you can hardly complete it in one hour. After we have achieved the desired size of the ring, we grind its ends on a grindstone and then process the edges with a round file.
When making the first coin, 2 mistakes were made that you should avoid. The author of the video did not immediately use the heating of the coin and sanded the ring too much, but it turned out but without a pattern.
Let's make a second try. Let's make a ring from another coin with a face value of 1 ruble. Let's make a hole, warm it up thoroughly and start forging. We repeat this process until we get the desired result. After the ring has taken the required shape, we will process the edges. Next, we will begin to carefully sand it, and the most important thing here is not to sand off the entire drawing. With some skill, many will do much better.
In an age when a lot is available and choosing an interesting, mesmerizing gift can be quite difficult, a coin ring becomes that original present that you want to give to a loved one or even to yourself. For the first time, such rings began to be made in the USA, and subsequently this method of making unusual jewelry spread throughout the world. Today, such products are sold at high prices and are very popular.
Features of creating a ring from a coin
Experts in this field note that you can easily make a coin ring yourself if you have the necessary working tools in your arsenal. However, at first glance, the instructions for making jewelry are confusing and make you feel insecure.
You should also choose the right coin for making jewelry. Experienced jewelers note that pennies minted from silver, brass, steel or bronze are suitable. They must also be of the required diameter so that the ring does not turn out to be too small.
Important! Parts that contain copper and nickel are completely unsuitable for the production of such jewelry. A product made from such an alloy can cause allergic reactions on the skin and provoke poisoning.
When selecting material, you should pay attention to the safety of the material from which the coin is made, its color, size and strength. Once you are convinced of the quality and safety, you can begin producing finger jewelry.
What does it take to make a coin ring with your own hands?
 Any man who has a large supply of tools in his arsenal and a little patience can learn to make such an original gift on his own. Surely in the garage of almost every representative of the stronger sex you can find all the tools necessary for production:
- cutting out disks (you can use a drill, but the result will not be so ideal);
- crossbar (some use a regular piece of reinforced pipe);
- vice (it is quite possible to do without them, but they make the process more convenient);
- regular hammer;
- a hammer with a plastic tip (to preserve the design on the coin);
- calipers;
- file;
- fine-grained sandpaper;
- polishing;
- burner.
The first attempts to work with unfamiliar material may be unsuccessful. You need to be prepared for this and not lose patience. The ring will definitely work for those who strive to achieve the desired result.
How to make a coin ring: instructions
 First you need to make a hole in the center of the coin. To do this, visually measure the center of the copper, and using a punch, cut out a hole with a diameter of about 15 mm. You can use a drill for these purposes, but the result will be much worse. Using a drill deforms the coin, creating unsightly and difficult to remove burrs.
Important! To facilitate the production process, you can heat the product on a gas burner. However, you first need to determine the material from which the money is made. You can check this using a magnet. If the coin is attracted, it is made of a steel alloy; if not, it is made of non-ferrous metals.
- for steel (it must be gradually heated and also carefully cooled, gradually removing it from the fire);
- for non-ferrous metals (alloys can be heated on a gas burner to a red-orange hue, and then sharply lowered into cold water).
During further work, steel products can be periodically heated with a gas burner. This will make the work much easier.
The resulting workpiece is put on a cone-shaped crossbar and, carefully tapping with a plastic hammer, it is threaded further along the tube. In this case, the edges of the coin gradually bend, taking on the rough outlines of the future ring.
Having adjusted the ring to the diameter of the desired size, using a plastic pipe and a regular hammer, the outlines of the ring are formed, which will be further processed and polished. Some sources recommend turning the ring over on the bolt to immediately give it the desired shape.
Next, the resulting ring needs to be polished and excess stiffeners removed. To do this, use fine-grained sandpaper and a drill with a coarse-grained sandpaper attachment. The edge of the coin is smoothed and made thinner, all protruding parts and inconvenient points are polished so that the ring fits well and is comfortable.
Then all that remains is to finally polish the resulting decoration. For this you can use, for example, Goye paste. In the end, the ring will acquire the correct shape and a beautiful shade, and the chasing, carefully preserved, makes the jewelry original and attractive.
There is another way to make a ring from a coin. It will require a minimum set of tools:
- tablespoon;
- drill.
This production option is labor intensive, so a man will have to be patient and diligent. During the production process, additional means may appear that will make it more convenient for the master to achieve the result.
Important! You need to choose the right size coin so that it is larger than the finger on which you plan to wear the headband in the future. You should not take multi-layer coins at the first stages; the process of processing them is quite complicated.
Place the coin edge-on on a hard surface. Holding it with your fingers, we begin to tap the spoon three times. Then the “blank” is turned and tapped again. For work, it is better to give preference to a massive spoon to make it easier to work with.
Important! You need to hit the coin quite often, but not too hard. The main thing is that the metal surface expands gradually. The tapping should be uniform to avoid unsightly dents.
Once the source begins to approach the desired dimensions, you need to start measuring it with a caliper and continue working until the ring takes a rough final shape.
Using a drill, drill a hole in the middle of the future ring. Then we expand it using a round file to the desired diameter. Next, all that remains is to polish the ring to a perfect shine. First, fine-grained sandpaper is used, and then dense felt fabric.
The decoration turns out shiny and beautiful. It looks like it came off the tool of a famous jewelry maker and is made of precious metal. Armed with a simple and accessible tool, any man can independently make a ring from a coin and please his loved one or close friends with such a gift.
History of the idea
In the recent past, American designer Nicholas Heckman decided to create silver coin and a hammer ring for your beloved girl. No one could have imagined that the result would be an exclusive and original piece of jewelry that would delight not only the young lady, but also her relatives.
How to make a coin ring with your own hands at home?
First of all, you need to prepare for the process. You need to choose not only a coin, but also tools for work. The requirements for the coin are not that extensive. Of course, coins equivalent to less than 1 ruble are unsuitable for work, since they are not the right size. And the rest of the qualities are quite standard for metal.
Choosing a suitable coin
When selecting a coin, pay attention to the following set of qualities:
- Maximum strength. The coin will be processed to create jewelry, so the metal must withstand all mechanical and thermal stress.
- Safety. A handmade coin ring should not cause any harm to human health.
- Color. This option depends on individual preference. According to the color scheme, the coins are: bronze-yellow and silver-steel.
- Size. It is impossible to make a ring of even medium diameter from small coins.
Important! How bigger coin, the wider the ring will be.
You can make a coin ring with your own hands at home from the following materials:
- Silver.
- Brass.
- Bronze.
- Steel.
All these materials are absolutely harmless and quite durable.
Important! Be careful with coins containing copper and nickel. Metals are not safe. They can cause skin diseases, allergies and poisoning of the body.
Handy materials for work
In addition to the coin, you also need to select tools. If you have a whole workshop, then making jewelry will not be difficult using special tools. We will talk further about how to make a ring from a silver coin under such conditions. In the meantime, we will conduct a master class for “crazy hands” who prefer to do everything at home.
Coin ring. Method No. 1
So, for work you will need:
- Drill or crossbar and plastic hammer.
- Vise.
- Sturdy stainless steel spoon.
- An anvil (or piece of rail).
- Coarse and fine grain sandpaper.
- Drill.
- Power tool with attachments for grinding and polishing.
- Pliers.
- File.
- A piece of woolen fabric.
- Abrasive composition for polishing.
As you can see, there are no technical difficulties in finding tools. Now let's get to work, acting to the best of our skill and ingenuity. However, do not forget about safety precautions.
Prepare the following protective equipment:
- Protective glasses. Do not take off your glasses until work is completed.
- Mask.
- Specialized gloves. During your work, you will be dealing with heated metal, and this is unsafe.

Coin ring - step by step instructions:
- Take a coin in your left hand and place it edge-on on the anvil.
- Take a spoon in your right hand. Applying with the convex part, start tapping evenly along the entire edge of the coin. For example, tap one side three times, then turn the money a little and tap the other side. Everything should be evenly, if you knocked three times on one side, then the same number of knocks should be on the other side.
- Check the shape of the workpiece periodically. Stop when the edge of the coin is wide enough to fit the width of the ring.
- Mark the center of the coin using a nail or other pointed object.
- Make a hole in the center of the coin using a drill and metal drill bit. Stop the drill as soon as it passes through the money. The tool will jam into the metal, allowing you to move on to the next step.
Important! Be careful, the coin may get hot when drilling, so hold it with pliers.
- Use coarse sandpaper to sand the outside of the ring blank.
- Turn on the drill so that the coin spins on the drill. Process the edges of the workpiece.
- Take fine-grit sandpaper. Turn on the drill and repeat the sanding.
- Prepare a cloth and apply an abrasive compound to it.
- Carry out the final stage of polishing the outer surface of the workpiece using an abrasive cloth. To obtain a mirror shine, polish several times.
- Clamp the workpiece in a vice. To avoid scratching the coin and to protect it from dents, use paper or cardboard pads.
- Enlarge the hole in the coin to the required size using a drill or other tool (bolt and plastic hammer). This is the most difficult and painstaking stage of the work. It is very important to monitor symmetry and thickness here. Everything must be done carefully so as not to damage the product. Periodically remove the coin holder and check the diameter of the hole.
- Turn on the power tool with the sanding roller and smooth the inside of the workpiece. After processing, the edges of the product will become sharp.
- Run a file along the edges of the workpiece on all sides at a 45-degree angle until they become more rounded.
- Sand the inside surface of the product with a polishing pad and a small amount of abrasive material. Remove any remaining roughness.
- The homemade ring is ready.

- If you only have a drill, a bolt and a plastic hammer, then to make a hole, place a coin on the bolt (a rod that widens towards the bottom). Accompany it with precise, neat blows of the hammer into the lower, expanding part of the tool. Focus on the mark located on the crossbar indicating the completion of the work.
Important! To prevent the product from becoming like a cone, periodically remove it from the crossbar and place it on the reverse side.
- To grind the workpiece from the outside, you can make a homemade attachment from a suitable bolt and two nuts. Insert the drilled coin into the bolt and secure it with nuts on both sides. Attach the homemade attachment to the drill and sand the workpiece using fine-grit sandpaper. Next, using the same technique, polish the product with a piece of leather.
As you can see, making a coin ring with your own hands is not as difficult as it might seem at first glance. You can use other methods, which we will discuss below.
How to make a ring from a silver coin. Method No. 2
This method is for those who have specialized tools, such as a press and a punch (which applies pressure to the material during stamping).
So, proceed as follows:
- Place the coin in the punch.
- Punch a hole using a press. The hole can be drilled with a suitable drill.
Important! You can measure the wall thickness around the hole using a caliper.
- Remove any burrs from inside the hole using needle files and sandpaper.
- Place the workpiece in a solution of denatured alcohol and boric acid to protect the metal from flames before firing.
- Hook the coin by the center using a metal wire and bring the blank to the burner to burn off the alcohol. As a result, the coin will be covered with a protective white film.
- Heat the workpiece with a torch until it turns a dull orange color.
- Immerse the coin in water. Repeat the heating and cooling process several times.
- Decide which side of the workpiece will be on the outside of the ring.
- Place the coin face down in the frame.
- Place in the center of the workpiece big ball from the bearing.
- Place the frame with the coin in a vice and squeeze slowly.
- Remove the frame from the vice. The coin must have a conical shape.
- Place the workpiece on a conical mold. Using a wooden hammer, lower the ring as low as possible while rotating the mandrel.
- Remove the ring. Now it needs to be aligned and the size checked on the ring mandrel.
- Lightly align the ring in a vise.
- Take the mandrel with the smallest cup and place the product with the wide side down.
- Squeeze the vise very slowly.
- Check the ring after alignment.
- To level the surface, place the ring in the mandrel and squeeze it in a vice.
- Check the ring from all sides. Place it on the sizing guide to make sure the diameter of the product is accurate.
- Finish the edges with a file.
- For polishing, use aluminum oxide powder mixed with water. Apply the mixture to the rough side of a piece of leather and polish the product.
- The ring you created with your own hands is ready and shiny.
There is another interesting way to make a ring with your own hands. We suggest making jewelry from a common plastic bottle. This method of making a ring will appeal to the female half of our readers, since no special tools are needed to create a unique accessory.
How to make a ring from a bottle?
Many original decorations and crafts are made from plastic bottles. For example, necklaces, bracelets and rings. Various materials are used to decorate products, and the method of making unique jewelry is quite simple.
For the ring you will need:
- Plastic bottle.
- Scissors.
- Scotch.
- Iron.
- Thermal gun.
- Ribbons (lace).
- Rhinestones, beads, chain (for decoration).
Step-by-step instruction:
- Wash and dry the bottle.
- Cut a strip 1-2 cm wide using the smooth part of the container.
- Make a blank from the strip to the size of your finger.
- Cut off the excess material.
- Secure the workpiece with tape.
- Turn on the iron to maximum temperature.
- Press the edges of the ring with an iron. Process the workpiece on both sides.
- Decorate the base of the ring with thin ribbons. Wrap the tape around the ring and secure with silicone glue.
- Cut the end of the tape, singe it with a match and glue it.
- Glue a bead (rhinestone) in the center of the ring using a heat gun.
Now you know how to create a unique piece of jewelry using improvised materials and without special expenses. In the same way, you can make rings of different widths using colored threads, lace or ribbons. You can decorate the finished ring with beads, rhinestones or a chain. Glue all elements using a heat gun.
Video material
Create your own unique and inimitable jewelry, choosing your own available tools that you can handle masterfully, and create for the joy of yourself and your loved ones!
You can also wear the ring yourself.
History of the idea
Once upon a time, using a silver coin and a hammer, designer Nicholas Heckman created a homemade ring for his beloved girlfriend. No one expected it to turn out so well, and the relatives and the young lady herself were truly delighted with the work done. Subsequently, Heckman released a whole series of designer rings, which added to his fame and recognition. It happened that he had to suspend the sale of products because they were in amazing demand. Heckman shared his practical guidance with the public and now everyone can become a home jeweler in a comfortable and convenient environment.
Tools for making a ring
Obviously, it is initially necessary to select a tool for making a hole in a coin; here the choice depends solely on ease of use and the manufacturer’s preferences, for example: a drill, a hammer (plastic) and a bolt - a completely standard set for this type of work. In order to give the coin ring shine and completeness, you will need a piece of sandpaper. It follows from this that, in technical terms, there should be no difficulties in finding materials; everyone can act to the best of their skill and ingenuity.
Coin selection
In reality, the requirements for choosing a coin are not that extensive. There is a set of qualities that it must meet and be processed according to it to create a future product. First of all, it must be as durable as possible and not harmful to human life. In this case, brass, silver, bronze and steel are absolutely harmless. The color of the coin for the ring depends on individual preferences, but the size is a general indicator - coins equivalent to less than 1 ruble will not be suitable for work.
“Crazy hands” or “I myself”
When choosing a coin for a ring, pay attention to the choice of material; silver has a big advantage. The first step is to heat the coin until a bright red hue appears, but the important thing here is to find golden mean and do not overdo it, since the elements may be damaged, and the coin itself may take a form that is not desirable for further work. At the end of this procedure, the coin must be immediately lowered into cold water; a characteristic sound will be heard, but you should not be afraid of this, because this is considered an absolutely normal manifestation during such an interaction.
The next step in making a coin from a ring will be making a hole - this is a rather important moment, since it is important to monitor symmetry and thickness; the larger the hole, the correspondingly thinner the product. Then the hammer and bolt come into their own. For those who do not know what a bolt is, it is a tool for making chain links that visually looks like a rod that widens towards the bottom. The coin should be placed on the crossbar and be guided to the lower part with precise, neat blows of the hammer, increasing in width. This is a rather labor-intensive process that requires concentration and patience. You need to focus on the mark that is located on the crossbar and indicates the completion of the work. Why a plastic hammer? Because any other method increases the risk of damage to the product tenfold. There is one more subtlety that must be taken into account. To prevent the product from visually becoming similar to a cone, it must be periodically removed from the crossbar and placed on the reverse side.
Video option
Grinding process
Grinding a coin ring is the most enjoyable process in making such a product. When the desired shape appeared and the coin turned into a real work of art, all that remained was to bring the matter to mind and give the ring a marketable appearance. Sandpaper not only adds shine, but also smoothes the surface of the ring, after which it becomes smooth and pleasant to the touch.
There is one more secret how you can add extra smoothness to a coin ring. To do this, use a regular spoon, which is needed for light tapping on the surface of the ring. Here, again, it is important to be careful and careful, because any intervention with more force than necessary can ruin everything that can be done up to that moment.
Safety precautions
Anyone who is going to create a ring from a coin should understand that this is a rather dangerous process,  which requires a certain approach and compliance with technical rules. The most important thing that a novice master should remember is safety glasses, which should not be removed at the entire stage of the work. A mask and specialized gloves are also important, since when interacting with heated metal, every mistake made can result in serious injury. The work area must also be appropriate to the occasion and protected from unwanted interference by production costs. All materials must be in sight, and the process itself must be carefully planned in advance. It should be remembered that when choosing a coin, preference is given to coins made of a soft alloy; they are more suitable for work and are appropriate for creating such a product.
Experience of professionals
In order to achieve maximum shine on a coin ring, sandpaper alone will not be enough and more experienced craftsmen suggest using an abrasive compound. This can be considered quite reasonable advice, since this composition is used to treat the surface of hard materials, be it metal or rocks.
In any case, only by mastering the initial techniques, you can create your own unique approach to making a ring and choose your own available tools that only you can masterfully handle.