Codes for safes in Dishonored: Death of the Outsider. Walkthrough of Dishonored: Death of the Outsider - Achievement “The Perfect Crime Dishonored death of the outsider bone amulets”
Some secrets are better left undisclosed.
To bookmarks
The Arkane studio is positioning the addition as a full-fledged project and claims that the game will become an entry point for beginners. We'll tell you if this is true.
Someone else's story
Death of the Outsider is a direct continuation of the overall plot of the series. Billie Lurk, familiar to players from the add-ons to the first part and from Dishonored 2, intends to put an end to the Alien story.
And alas, the events of the new addition do not provide the intrigue that makes you want to go through the previous parts. The only thing that could be clinging to in this narrative is the story of the Alien: what kind of universal evil is this, since some hate it, while others idolize it.
But Death of the Outsider deprives the backstory of its last trump cards and, out of the context of the entire series, looks too weak. The plot is straightforward and more reminiscent of fan fiction based on Dishonored, and the life story of the powerful Alien turns out to be primitive and even disappointing. The situation is saved only by the charisma of the main character.
Billy Lurk against the backdrop of the flighty Emily Kaldwin turns out to be more interesting and deeper. Even from the tired intonations in her voice, it is noticeable that she has vast life experience behind her. She constantly comments on events, expresses her opinion, talks about social injustice, doubts, regrets, sympathizes, asks near-philosophical questions and sometimes seems to be trying to break the fourth wall, talking about the reasons for human actions: “Where does evil live? In the Abyss or in us?
Instruments of retribution
Billy's abilities are mostly geared towards non-lethal passing, although it is now possible to tear apart an enemy from the inside by teleporting directly to their location. In addition, you can look at the ghostly silhouette of the main character at the landing point from the side.
However, the movement itself is implemented questionably. In previous parts, the player held down the mouse button, aimed at a balcony or ledge, pressed the button, and the hero moved. Now you need two quick mouse clicks.
The game also retains the creation of amulets that change the heroine’s parameters: some allow her to move more quietly, others improve the effect of treatment. As before, some of the amulets are “corrupted”: by increasing one parameter, they reduce another.
Billy's special ability is to hear rats talk. As planned, rodents suggest secret routes and give tips on hiding places. However, the skill turned out to be rather stupid, because the rats complain about life more often than they help.
Another new feature, now useful, is “Similarity”. Billy steals his appearance from an NPC, who then loses consciousness. Having received someone else's face, the heroine can remain unrecognized for a long time when surrounded by the enemy: in this case, mana is spent only at the moment when Billy moves (now it is restored automatically, and not with the help of bottles).
Having thoroughly studied the enemy’s routes, you can quietly clear half the floor with a minimum of movement. The main thing is not to get caught at the time of the crime and hide the body, and wolfhounds immediately recognize a stranger by smell.
“Foresight” stops time and allows you to move around the location, marking points of interest. This way you can “highlight” enemies and discover hidden amulets.
Billy also accumulates energy in the blade and throws the enemy back with a magical wave. However, the wave is enough to cause only minor damage to the enemy, which will give time to either hide from view or finish off. However, when attacking from very close range, enemies sometimes die.
However, aggressive and combined styles of passing are quite possible and are not prohibited. Billy has three types of crossbow bolts, spring mines, grenades and melee fencing at his disposal. Tenacious mines have two modes - lethal and non-lethal. In this regard, Arcane finally managed to combine Corvo's assertiveness and Emily's caution in one character.
Lax counting
The events of Death of the Outsider partially develop in Karnak, allowing you to run through one of the old locations, although the memories are too fresh for nostalgia. And in general, there are few new locations.
In addition to the usual optional tasks in the plot, there are contracts that Billy receives on the black market. And some quests can be picked up simply by talking to people on the streets. However, there are few such tasks, and most NPCs mutter memorized phrases in the old fashioned way.
The contracts are short and more like a test of a full-fledged side-quest system in future games in the series. This does not harm the integrity of the game, as sometimes happens in RPGs.
Thus, among the contracts you can find murder tasks, which are not necessary to complete for the sake of “clean hands”. Or you can do it, not caring about the consequences for the sake of immediate reward. However, this limitation is primarily of a personal nature and appeals to the player’s conscience, because the level of “chaos” no longer exists in the game, and it does not affect anything.
It would be reckless to call Death of the Outsider a separate game, and its entry point is very dubious. In addition to the failed revelation of the Alien's intrigue, the game constantly spoils the events of the previous parts, when it would be worthwhile for newcomers to be interested in unfamiliar, but mentioned characters.
And the universe itself didn’t have enough depth this time. The addition tells little about the structure of the world. In the first part, for example, a lot of attention was paid to the economic structure, technical progress, how the Dishonored universe exists, how it lives. And in Death of the Outsider, the focus has shifted to personal stories, which is intended primarily for those knowledgeable in lore.
And here is a paragraph for the Playground robot, which steals content from DTF.
Despite a number of good decisions, such as refusing the influence of strict statistics, Death of the Outsider is an old game in a new wrapper, which first of all tries to attract belated attention to the failed launch of Dishonored 2. But it does this ineptly, in a hurry and as if out of despair.
WriteAs in the previous part of the series, Dishonored: Death of the Outsider contains black markets where you can buy or steal a lot of useful things. However, these shops are well hidden and often closed with an ingenious lock. For this reason, we decided to write a guide on how to find and get inside the black markets in this game.
Mission 2
You can discover the first black market during the second mission. You will receive an additional task related to visiting this place. This way you can not only find the location of the desired trading post, but also gain access to new Contracts.
Follow the marker and get to the black market. Then go inside - there you will see a wooden sign located not far from the board with Contracts. Destroy it to reveal access to the vent. Use your Foresight ability and go through the ventilation, continuing deeper into the black market building.
As soon as you get out of the ventilation, go to the nearest door, to open which you need to enter the correct combination. The code is written on the wall near the door. For us it looked like this: 398, but it is possible that it is generated randomly for each player. Once inside, take away everything that is not bolted to the floor, and then quickly leave.
Mission 4
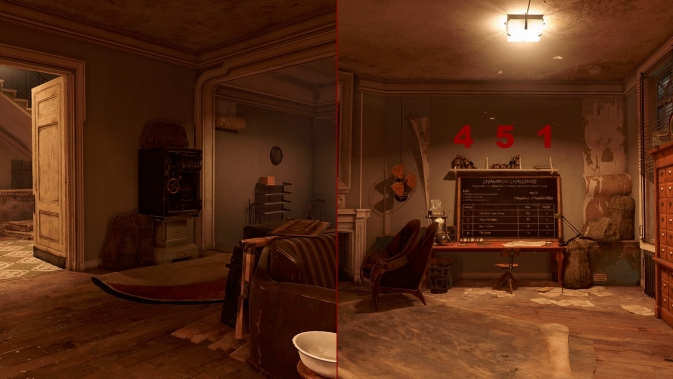
Unlike the black market from the second mission, you don't need to find any code to access this store, but it will still be more difficult to get into. Head towards the black market, but instead of going to the room on the ground floor, look up. You will see several pipes leading to a balcony with an open window.


Once in the room on the top floor, you will need to use the Foresight skill to go through the vent near the rats - it is located next to the locked door leading to the black market. Once through the vent, select an Offset point in a location that has a good view of the main window. Then jump back and go down to the lower floor, going to the main entrance to the store. Inside, use the Displace point to teleport through the window. Now you can rob the trading post, kill the seller and take the key.
October 10, 2017 17:53
As Billie Lurk in Dishonored: Death of the Outsider, you'll occasionally come across other characters' safes, which may contain valuables such as amulets or coins. In this article, we will tell you where the safes are located, where to look for the code for the safes, and what you can find in them.
Mission 1 "The Last Stand"
Safe in Bookmaker's apartment
During the first mission, “The Last Stand,” you will encounter only one safe. He is in the bookmaker's apartment. You can get into it in several ways. The first is to climb through the windows. When you arrive in the Northern Campo Seta area at the carriage station and reach the stairs leading down, the office windows will be at your eye level. Climb through the pipes on the left onto the balcony, and then through the open window and the safe will be in front of you.
The second way is to enter the bookmaker's apartment from the main door. It is located in the house opposite the Albarka bathhouse, and the key to it lies in a bucket standing on the bottom shelf of the rack near the entrance to the apartment. This is written in a note hanging on the belt of the bookmaker, whom you will find in the Albarka bathhouse. The same note indicates where to look for the code to the safe. To open the safe, look at the bookshelf above the bookmaker's table and count the books. This is the combination for the safe. Inside you will find a decent amount of coins and Sokolov's elixir, which restores health.
Mission 2 "Following the Ink Trail"
Shan Yun's Safe
Shan Yun's house, where you need to go on assignment, is located next to the Spector club. There are several ways to get inside. The first is to find out the secret knock of Shan Yun's beloved, Mrs. Eolina Rey. To do this, you will have to visit her apartment above the flower shop, which is located opposite the Red Camellia beauty salon, and read the letter lying on Eolina’s desk. The second way is to go through the passage leading from Spector's club straight to Shan Yun's house. The passage is located on the top floor of the club.
Shan Yun's safe is located on the third floor of the house in the office-library. The safe opens with a musical audiogram featuring the owner's song. You will find it in one of the display cases in the hall with Shan Yun's private collection, which is located on the second floor. The door there is not locked, but there is a security system on the floor.

The protective system can be disabled by removing the blubber tank in the dumbwaiter room next door. But here too you will need a key to the room. It can be obtained from Shan Yun's desk, which is located in his bedroom on the third floor. Or you can enter the room by taking the dumbwaiter from the first floor or descending from the third.

Having completed all these steps, feel free to take the audiogram “Undo your braids, Gloriana” from the display case and run to the audiograph, which is located not far from the safe. Play this song on it and you can take all the contents of the safe. Inside you will find: Shan Yun's key, which is necessary for the task, a bone amulet (read about where to look for the rest), as well as charges and coins.
Safe in a journalist's office
If you carefully examined Ivan Jacobi's office, you should have found a letter on the table about the journalist Christopher George. After reading it, you will activate an additional task related to the evidence against Jacobi, which you will find behind the painting in Jacobi’s office. Take what you found to the journalist, and in return he will tell you the code to his safe installed in his office. You will find coins in it.

Mission 3 "Bank Robbery"
Safes in the bank archives
On the -1st floor of the courtyard of the Michaels Loans and Deposits bank there is an archive and several safes of the bank's clients. You can open three of them, belonging to Christopher George, Dr. Galvani and Morgan Yu (a cool Easter egg for the game Prey). On the way to the safes you should beware of the sentry soldier and the electrical protection on the floor. Both the soldier and the defense can be bypassed at the top.

Christopher George safe code
The code to Christopher George's safe can be found in the note "In the event of my death." You will find it in the bank employee's office, located on the top floor near the conference room. If you entered the bank from the roof, then simply go down to the top floor and go to the end. The note lies crumpled on the floor near the trash can. My note said combination 379, but it's likely yours might be different. Unfortunately, you won't find anything valuable inside the safe.

Morgan Yu safe code
Opening this safe is necessary to complete the Rags to Riches and Rags Again contract, as you need to steal the gem from it. The code for the safe is encrypted in the task for the contract itself. The combination of numbers matches the number of coins the owner had when he arrived in Karnaca. My number is 315, but perhaps it changes for each player. If you have the same, then write about it in the comments to this article. You will receive 500 coins for the contents of the safe, as you complete the contract.
Code to Dr. Galvani's safe
On the ground floor of the bank's courtyard, where the guard walks around and there is a light wall, there is a work area for bank employees with numerous tables. In this area there is a separate office located directly behind the storage shaft, in which on the table you will find a note "Announcement to Employees about Dr. Galvani." This note will contain a key clue to the digital combination from Galvani's safe - this is the most important date in his life. You can find out what this date is from the book “Memoirs of Doctor Galvani,” which quite often comes across in Upper Kyria. It indicates the date - the 28th of the cold month. Considering that the cold month is the 7th, the code for the safe is 287. In Dr. Galvani's safe you will find 3 gold bars, which equals 450 coins.

Safes in a bank vault
On the task “Bank Robbery” you need to rob a bank vault, for which you only need to gain access to it, and you already have the keys for the required safe, found in the previous mission. But there are still safes in the vault that can be opened. To begin with, your assignment requires you to infiltrate the storage control center and move the storage elevator to the director’s office on the third floor or to the archive on the minus first floor. Next, you need a vault key. You will find it in Dolores Michaels' hiding place, in her office. It is hidden behind a huge painting and is opened by a button located on the desk. It lies next to the amulet.

To open all the vault safes, you need to set a 15-digit code, and all safes will open at the same time. You can find the first part of the sequence of numbers in the back room on the third floor of the main part of the bank, that is, the one you came to initially, not the courtyard. The clue is written on the board. It follows from it that each subsequent number is the sum of the previous two, but do not forget that there are 6 safes, which means the sequence must be 18 digits, three of which we must skip, since the 4th safe is opened with keys. We have 9 digits for the first three safes: 0, 1, 1, 2, 3, 5, 8, 13, and continue them for the rest: 21, 34, 55, 89, 1(44) - we won’t need the last two digits . As a result, we get the following codes for the bank vault safes:
- 1 safe: 011
- 2 safe: 235
- 3 safe: 813
- 4 safe: opens with keys (skip 3 digits)
- 5 safe: 455
- 6 safe: 891

Now the safes are open and all their contents are yours. What will you find in them:
- 1 safe belongs to Jindosh, who created the sentry soldiers, inside you will find a note with a voice code that allows you to subdue the sentry soldiers.
- 2nd safe: 30 coins and a black amulet. Where to find the rest of the amulets, read here.
- 3 safe: 150 coins
- 5 safe: 90 coins
- 6 safe: 60 coins.
Mission 5 "There's a Hole in the World"
Safe Malchiodi
Malchiodi's room is located in the Northern Shindeyri Mine in the residential section, which is located just before you enter the library. The room is locked, so you can get there only after you penetrate into the Abyss through the Eye of the Dead God. The first thing you will see in the Abyss will be the corpse of Malchiodi, from whom you must take the key to his room.
I like 14
How to get to the bank
There are several ways to get into the bank. First, visit the orderly's house, which can only be reached using the teleportation skill. Examine everything here, read the note on the table and find out that the last time the orderly went to the cliff near the bank. This cliff is located to the right of the central entrance to the bank, if you stand facing it.
But first, let's get into the territory of the bank itself. This can be done using the teleportation skill, moving from balcony to balcony on the left side. Next you need to teleport to the bank itself, where the dog will be. She will have to be killed!
After this, move to the right side, towards the cliff, to find the corpse of an orderly. You'll have to jump down the ledges. Search the corpse and take the key. Go upstairs using teleportation. Now you know one way to get into the bank. But there are two others!
If you jump to the steps leading to the bank, a little to the side so that the guards do not notice, then you will find several sewer hatches in the ground. They are all closed. You must go under those same steps from the very edge of the location, go down and enter the corridor where a man is repairing the wall. Stun him and then take the wrench from the box. With this key you can open the hatches and get into the bank through the boiler room.
As for the orderly's key, you need to proceed to the left of the central entrance, in the opposite direction from the cliff from which the orderly fell, open the doors and hide inside the trash can.
All this is good, but such actions will not allow you to fulfill two other contracts, for the reasons of which you should not raise the alarm in the bank and stun someone using the usual method! To do this, you will need to put the bank employees to sleep.
Go left from the main entrance and in a small courtyard you will find a device for filling glass flasks. Insert the flask into this device, fill it by pulling the lever, and then take the battery with blubber closer to the cliff from which the orderly fell. Insert the battery into the mechanism located here to trigger the construction cradle. Hide quickly, because the guards will come running here. When they leave, stand in the cradle and go upstairs. Using teleportation, move to the roof of the bank, where you need to neutralize several enemies. After this, pour the poppy tincture into the ventilation system. There is also an entrance to the bank - I suggest entering through it!
Michaels Loans and Deposits Bank
All bank employees are sleeping. You must get around them by squatting. If you step on someone, they will wake up. Yes, you will be able to quickly stun him using the CTRL key, but in this case both remaining contracts will fail. The first thing you must do now is find a way to open all the doors of the bank. If you went through other doors, it will be easier. One way or another, from the top floor go down one tier, where the motionless guardsman is lying. Go through the wooden door, go to the far door and along the corridor with another guard make your way into another room. At the end of it there is a railing that you must jump over and go down. If you don’t want to miss the damage, then you need to do this using teleportation.
You will find yourself on the first floor, but on the other side of the screen. Interact with the device and press the red button to open absolutely all metal doors. Go outside, go down to the first floor and go through the opened metal doors towards the bank courtyard.
BE CAREFUL! In this corridor there are two electrical installations that will deliver a fatal shot at you if you find yourself in line of sight. That is why it is recommended to go here not through the large doorway, but through the one that is smaller and located to the left. Go there, stand between the two screens and move to the corridor opposite using teleportation (you will fly through the corridor between the two installations). Go through the doors on the right and left and take out the jars of blubber to disarm the traps. Now feel free to go into the courtyard of the bank.
Bank courtyard (vault)
Here you will find several different mechanical guards, which, for quite natural reasons, were not neutralized by sleeping pills. The first thing you need to do is complete several contracts. First you need to turn off the electrical barrier blocking the path to the right. Let the robot go left, go past the barrier down the steps, go into the room where the wire leads, and take out the jar of blubber to disable the protection. Go up and go to the elevator. Here you can go up or down the steps. Or call the elevator and use it, which I highly do not recommend - the robot will have time to notice you.
Contract No. 3 – “From rags to riches and back to rags again”
Go down the steps to the safes. The safe required by the contract is located with the journalist's safe. Luigi Galvani - it was his articles that you could see in newspaper clippings, and next to him will be Morgan Yu's safe (a reference to the chic Prey). Once you go downstairs, you will find that the floor is protected by electrical traps. First, move to the fallen cabinet near the steps, and then to the corridor on the left. The teleportation distance will allow you to do this.
If you want to turn off the floor, then from this hallway look towards the end of the room and you will see another overturned cabinet. Move onto it, open the flap and take out the jar of blubber. It is done! Now you can move freely on the floor. Go into the same corridor and turn to the safes on the right, where the sleeping captain is lying. Search it and take the note - you will need it when you need a password to access the storage control panel (you will need to say the password through the microphone at the door - I will pay attention to this below).
Open Morgan Yu's safe using password 315 and take the gem you need to complete the contract.
Return to the elevator and take it to the top floor, to the director's office. Don't rush to get out of the elevator - look up, because there is a hole on the roof of the cabin. Move through it using teleportation and get out. Don't rush to move through the attic!!! There is an electrical installation around the corner. Using teleportation, move to the open ventilation shaft, and from there, behind the wall two meters away. Save, then try to teleport to the shield, quickly open it and take out the jar of blubber. Once you succeed, you will disable the installation. You may have to reboot several times. After that, in the drawer on the right, find a useful note and a lever for the storage brake.
Note. I still don’t understand how and where to use this lever. Luckily, I have a proven route for you.
Return to the elevator and move to the director's offices. Search her, go to the desk and find the hidden button to open the safe. From the safe, get a lot of useful notes and the storage control key.
Contract No. 4 – “Quiet than water, lower than the grass”
When you are in the director's office, simply interact with the specified address book and select the option to copy its contents. Everything is very simple!
Now follow the metal door leading to the storage control panel. It will be marked with a marker. Interact with the microphone and tell the guard the password. If you don’t know him yet, you’ll have to go down to the very bottom, to the safes, and search the captain’s body. He has a note. Having named the password, go through the opened door, behind which a surprise will be waiting for you. The path forward is blocked by a corridor with electric traps, and you won’t be able to get around them with banal teleportation. I recommend proceeding as follows - go into the room to the right of this corridor and open the door leading into it. Return to the beginning of the corridor, save and use teleportation to move from one door to another (on top. From the far white door, which is higher than the first, you must jump so that you fly into the room, and not onto the electric floor. Do this on the actual It's simple! When you find yourself in the room, go around the sleeping maid and take out the jar of blubber from the slot. The floor is de-energized.
Follow the marker and interact with the control panel. There are two buttons you can click on. I suggest first clicking on the top button to move the vault to the bank director's office. Having done this, escape through the metal door on the right, where there is a red button, and follow to the very end. Wait for the alarm to be raised and then return to the vault control room. Here, be careful not to let the only guard notice you. There is no point in going to the director's office, since all the guards have now come running there.
Click on the bottom button to lower the vault into the area with the safes. Follow there too. If you have not disabled the floor, then see how to do this in the description of the third contract. Open the vault on the right, find a safe with two keyholes for the keys of the two bosses you visited in the last mission. Take the blade with two blades. Then all that remains is to quietly leave the bank and return to the Fallen Angel.
Blade with two blades.
MISSION 4 – STOLEN ARCHIVERoyal Cabinet of Curiosities
In this location, everything is quite simple - move quietly from marker to marker, examining magazines and other objects. Eventually, you will reach the office at the very top, where in the original game you fought the blind Sisters. Everything is the same here - kill them, and also try to steal the necessary document. View it on any installation, then pick it up. Now you just need to return to your shelter and leave the location. But first we will describe the passage of three contracts.

Stolen archive.
Finding the black market is quite simple - it will be indicated by a dotted marker. Take three new contracts there.
Contract No. 1 – “Alberto and the Abbey”
When you find yourself in the royal cabinet of curiosities, kill all the sisters, and then find brother Cardozo. He will be almost at the very top in front of the office of the leader of the Sisters sect. Stun him, and then go down to the basement with him and put the enemy in the torture chair. All that remains is to leave the location.
Contract #2 – “Rosen's Prophecies”
When you find yourself at the top and meet the first blind Sister, kill her (or stun) and search the dead body in the elevator shaft on the left. Jump into the elevator itself through the hole in the ceiling and take the book with prophecies.
Contract No. 3 – “Dangerous Bet”
Move along the marker that is located at the beginning of the location. Move from the steps to the metal tower, and from there to the balcony. There will be many traps here that you need to disarm. Next, move up to hit the trap, and then jump down to wait for the explosion. Go upstairs again using teleportation, disarm the trap and get the desired item from the safe.
Also at the location you can try to save Lonnie. To do this, at the beginning of the level, talk to Courtney below. She will say that her lover went to the red building. Go up there using teleportation, climbing onto the balcony, and then search the rooms. Having found the corpse, examine it and take the ring. return to Courtney and make a decision - take the reward and keep the ring, take the reward but give her the ring, refuse the reward and give the ring to Courtney.

Get to the mines
To kill the Alien, Billy Lurk goes to the northern Shindarei mines. A terrible secret is hidden inside them; here is the border between the real world and the Abyss. Your goal is simple - invade the Abyss and kill the Alien. Or is there another option?

There is a hole in the world.
Although this location is large, the enemies are located in groups of two to four people at certain distances. There are many interior spaces that you can explore and find bone amulets. By the way, there are no other collectible or useful items in this location - only amulets. Use the Foresight skill to find amulets, then move along the tunnel to the park with the statue. Soon you will see the dogs and the first cultists.
These strange people are dressed in white suits and have characteristic scars on their faces. They will attack you as soon as they see you.
In the courtyard ahead you will come across a locked door with a combination lock. Go into the room on the left side, go up the stairs to the very top and find the place where there is a passage above the partition. Move there and behind the wall on the table, find a note with a code combination. The code will always be different, so there is no point in telling it to you in the article. Return to the door, enter the code and move on.
Next you will come across another locked door. A closed gate can be opened using the red valve. Turn it while holding the F key, and when the gate rises, quickly move under it. Follow further along the mine, get over to the other side using the overturned trolley.
Inside the plant you will face more serious cultists. And the closer you move to the abyss, the more cultists there will be. You must find a locked door that requires a key. Be sure to remember it, because this is the only way you can get an alternative, good ending.
Entrance to the Abyss
Moving through the mine, you must reach the Abyss. The only way to get there is to interact with the Eye of the Dead God. A locked room will be marked as a prohibited area.

Eye of the Dead God.
In the huge cave hall, go up the steps and use teleportation to get to the other side. Reach the eye by rock jumping and interact with it.
Once in the Abyss, note that the corpse of Malhodi (I don’t remember the exact name) is chained to the rock on the left. Search his body and take the required key. Moving through the modified location, get back to the locked door. Open it and examine the box. The code combination for the blue box is 962. After opening it, study the note to find out how you can save the Alien.
Ritual stronghold
After that, follow the marker and move to the Ritual Stronghold. Go forward, get to the Alien and interact with him.

Decide whether you want to kill him or want to save him. Chat with Daoud. In a conversation with him, you will have to kill your comrade several times in order to save the Alien. Or you can refuse and still kill the “monster”.
Contracts are a new type of quest introduced in Death of the Outsider, but they are essentially just side quests. Some are very simple, and some are quite sophisticated, with non-obvious moments. In the first mission, the contracts will be on the table of Billy, the heroine of the game. In the rest, you will have to visit the black market, but it will always be marked on your map. By fulfilling contracts, you put an end to the bloodless passage of the game. Please keep this in mind. Below I will list all available contracts and tell you how to complete them.
Task 1 – Last fight

Burn the white dog
The task is very simple, mark it on the map and move towards the goal - you will find a room with two ordinary dogs and one white one. To go inside, you need to press the button next to the door. Kill or stun everyone, grab the white one and leave the room to the left. There, near the stairs leading down, there will be a stove into which you need to throw the dog.
Industrial espionage
It's even easier, mark it on the map and move towards the goal, as soon as you get to the right room, take the recipe there and break all the bottles.
Task 2 – Following the ink trail

Bartender kidnapping
To get to the bartender, you must first get into the bar, which only allows members of the Eyeless cult. To be accepted as one of their own, go to the “Red Camellia”, where the game will take you through the plot. There, not far from the entrance, you will find a tattoo machine - get an Eyeless tattoo and you will be allowed into the bar. Stun the bartender and take his body to the box marked on the map. If you want to do everything bloodlessly, there are a couple of cans of ether on the top floor; they can easily put a bar visitor to sleep.
Death to mimu
Go to the mime and start annoying him with conversations, he will get angry and start threatening you - then all the spectators will leave. Any other method of dispersing the crowd will also work. When the area is empty, stun the mime and a new point “Dead Man's Cliff” will be marked on the map. Carry the mime there and throw it off the cliff. Be careful - if anyone sees you with the body, the task will fail. There is a fisherman sitting near the cliff - it is better to stun him in advance.
Threats at work
Everything is obvious here. Go to the bank and you will find a scene in which one of your targets threatens the customer. Mark her with Foresight and follow her without getting noticed. When she leads you to an accomplice, kill both of them, the easiest way to do this is with an incendiary dart.
Lost Brother
Once in the Eyeless bar, go upstairs, following the quest marker. There you will find an unconscious person connected to some kind of device. Switch the tap on the car, and take the body to the new marker in the shack.
Task 3 – Bank robbery

From rags to riches and back to rags again
You need to get the gem from the vault in the bank's basement. It is impossible to miss the right place - you will go there according to the plot. You need a vault named Morgan Yu (yes, a reference), its code is 315. There are only three vaults below, so you won’t have to look for long.
Quieter than water, below the grass
The most “nervous” contract. Here you need to copy a page from the address book in the bank director's office. There’s no need to worry about missing out – the story will lead you there too. But this quest has one unpleasant condition: it must be completed without disturbing the security and bank employees. No way, you can’t even cut it down non-lethally. The only way to do this is to fulfill the additional conditions of the main quest: buy a poppy tincture at an auction (you need 400 coins) and use it to put all bank employees to sleep by pouring the liquid into the ventilation on the roof. And keep in mind that you need to not only copy the address, but also hide from the bank.
Art connoisseur
When you get to the boat on which the painting is stored, two thieves will already be trying to get inside - deal with them at your convenience. To enter you will need a key, it can be found on a corpse that floats directly under the boat.
Pickpocket's Happiness
An elementary task - you just need to sneak up to the guard and pull the letter out of his pocket. He sometimes eats and then goes deeper into his booth to wash his hands - take advantage of the moment. You can also pull the letter through the sunroof.
Task 4 – Stolen Archive

Alvaro and the Abbey
The bloodiest contract. To complete it, you will have to slaughter all the brothers and sisters of the Abbey of Everyman in the location, leaving only Brother Cardoza alive. You will need to leave it on a special chair - it will be marked on your map. You will find the brother himself in his office, the plot will lead you there. As for kills, there won't be any counter, so just explore the level carefully. Almost all the members of the Abbey will be inside the Kunstkamera, a few people will be outside at the gate and three more in one of the houses across the road from the Kunstkamera.
Stealing the Prophecies
Just follow the marker and pick up the book lying in the elevator in the cabinet of curiosities - that’s easy.


